Tuesday, June 25, 2013

Arduino Scalable Single-Stage Coilgun

In my earlier post where I built an Arduino Laser Tripwire, I mentioned that I was going to use this as a component to a later project.  I've built a scalable, single-stage coilgun that uses inexpensive components and a relatively tame 50VDC.

The premise of a coilgun is simple:  a ferromagnetic or paramagnetic projectile is attracted towards any strong magnetic field it encounters.  By switching on a strong magnetic field inside a solenoid, we can attract the projectile into the coil of wire.  When the projectile is inside the wire, the field is switched off and the projectile continues on the path it was following as it was sucked into the field.

This prototype has only a single stage, meaning that only a single solenoid accelerates the projectile; However, it can easily be scaled up.  By placing another stage just like it in the path of the projectile, we can accelerate the projectile faster and faster.  The projectile will break the laser beam for the next unit, then the magnetic field in the next solenoid will be turned on thus accelerating the projectile further.

I can achieve this multistage coilgun by placing a clear plastic barrel down the center of my solenoids, then shining the laser through the barrel.

My charging circuit, a Delon voltage doubler.

My charging circuit is a simple Delon voltage doubler.  The voltage doubler uses a 12VA transformer to convert the 120V AC from a normal US wall outlet to 24V AC.  The capacitors only need to be 24V, but I happened to have 35V capacitors on hand.  To protect my Arduino from any reverse bias that might be introduced by the relay coil, I include a 1N4937 diode in my design for protection.

My Arduino laser tripwire module., modified from my earlier design.
I have modified my Arduino laser tripire module a bit for compatibility with my trigger circuit.  I need a 1N4937 diode to prevent the voltage from my main capacitor from flowing to ground through the 100 ohm resistor on the trigger circuit.  The indicator LEDs are all optional, and power draw on my Arduino could be reduced by removing them.


The firing module for my prototype coilgun.
The firing circuit is quite spartan, dominated by a large electrolytic capacitor and a cheap 2N6507G SCR.  The 2N6507G can withstand a surge current of 250A but costs only 66 cents to purchase, making it an ideal centerpiece for my firing circuit.  To simplify things further, I use an entire quarter-pound spool of 16AWG magnet wire for my solenoid.  No winding was necessary:  I simply purchased the spool, found both ends of the wire, sanded the insulating lacquer off, and crimped on terminals.  I measured its inductance at 185 microhenries.  To be absolutely sure to protect my capacitor from any reverse bias that might be introduced, I have a 1N4937 protection diode across both the solenoid and the terminals of the capacitor.

Complete schematics for my prototype, generated with KiCad.

Before getting to the demonstration, I will share the source code that I uploaded to my Arduino Uno.  This source is similar to that which I included in my previous post, except I have modified it in two ways.  First, it opens the power supply relay at the same time that the SCR is triggered.  Second, it includes a charge signal (output 10) as well as a tripped signal (output 11).

int ledPort = 13;
int laserPort = 12;
int tripPort = 11;
int notTripPort = 10;

int timerToggle = 1000;
int timerCount = 0;
boolean timerState = false;

int onLevel = -1;
int offLevel = -1;
int currentLevel = -1;

boolean tripped = false;

void setup() {
  pinMode(ledPort, OUTPUT);
  pinMode(laserPort, OUTPUT);
  pinMode(tripPort, OUTPUT);
  pinMode(notTripPort, OUTPUT);
  
  digitalWrite(tripPort, LOW);
  digitalWrite(notTripPort, HIGH);
  
  // Check the state of the phototransistor with the laser on
  // and off.
  digitalWrite(laserPort, LOW);
  delay(1000);
  offLevel = analogRead(A0);
  
  digitalWrite(laserPort, HIGH);
  delay(1000);
  onLevel = analogRead(A0);
}

// An alive signal that appears on the arduino, 
// just to let me know the program is running.
void timer() {
  timerCount++;
  if (timerCount == timerToggle) {
    timerCount = 0;
    timerState = !(timerState);
    if (timerState) {
      digitalWrite(ledPort, HIGH); 
    } else {
      digitalWrite(ledPort, LOW);
    } 
  } 
}

void loop() {
  delay(1);
  timer();
  if (!(tripped)) {
    currentLevel = analogRead(A0);
    if (currentLevel < onLevel - (onLevel - offLevel) / 10) {
     tripped = true;
     digitalWrite(tripPort, HIGH);
     digitalWrite(notTripPort, LOW);
   } 
  }
}
Source code for my coilgun, as uploaded to my Arduino Uno.

Finally, you may check the YouTube video below to see how it works!


Thursday, June 20, 2013

Pinhole Camera, Mark 3

The underside of a limpet.
I pulled a couple more of my pinhole cameras from Magnolia Park the other day.  I've gotten better at hiding them!  This time two of three were still where I left them, and one was so well hidden that even when three of us were standing with our heads less than two feet from it we still took five minutes to find it.

These pictures were plagued by a problem from my original design:  the pinhole was simply too large.  The results were a little bit fuzzy, and the effects of condensation and mist rolling in from the Puget Sound are apparent.  Further, the summer sun was cut off at the bottom of the can.  These are problems that I hope to fix in my future pinhole camera projects.  In addition to using a smaller hole perhaps half a millimeter in diameter, I will place the hole higher up in the can.  In this manner, the can mounted vertically with the hole near the top will be less prone to cutting off the sun trails in the summer.  Further, I will include some silica gel inside the can to try to absorb some moisture before it can condense.  I will also experiment with a small amount of saran wrap or clear plastic over the pinhole to try to keep any moist air out.

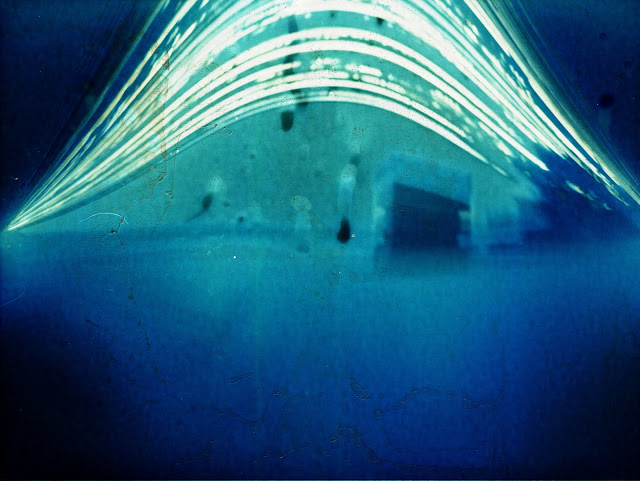
Pinhole camera mounted among some trees and overlooking Puget Sound at Magnolia Park facing roughly Southwest.  Black and white satin finish paper, 1mm diameter pinhole, exposed from March 3 - June 17 2013.

Tuesday, June 4, 2013

More Lessons from the Pinhole Cameras

With some help from a friend who lent me the roof of his Apartment building, we managed to take my best pinhole camera exposure to date.  It's still not great, but I'm pretty new to the art form and it's going to take some practice to get right.  This one was exposing for about 5 months from January to June 2013, facing South.  About half the frame is taken up by the roof of his building, and the rest should have looked like the city skyline, but it came out quite blurry.  The instructions I followed online for making them suggested a 1mm diameter hole, but I think that was misguided.  1mm is the diameter of a small nail, and everything came out fuzzier than a Georgia peach.  I think using an actual pin to make the hole as recommended in these instructions would lead to much better results in the future!  Also, after some experimentation with horizontal mounting, I would say that those shots were disappointing.  Be sure to mount your drink-can camera vertically (the way the can would sit if it was on the table) for best results.

In a previous blog post I suggested that the photo paper was forgiving to moisture, but the results of this image leads me to believe that in fact the fine details are washed away by any water or condensate that gets in, leaving only the bold sun-trails.

I've got a lot more of these in the works!  For now, enjoy my first kind-of decent pinhole camera photo.

The roof of an apartment building North of Lake Union, facing South over the city of Seattle.  1mm diameter pinhole, exposed on resin-coated 5"x8" black and white photo paper.  January-June 2013.

It can be improved quite a bit with GIMP, though.  If I invert the colors then take a look at the color curves, I can select a curve to improve the dynamic range of my image.

Improving the dynamic range of my pinhole camera picture using the magic of GIMP.
The end result is certainly a lot more interesting to look at than the original!

The same image as above, with colors inverted and dynamic range improved in GIMP.


Monday, June 3, 2013

Even More Betting Strategies at the DotA 2 Lounge

My previous post, Betting Strategies at the DotA 2 Lounge, is to date the most popular post I have ever made to this blog.  It's popular enough that I decided that I can do better!  There were some unanswered questions in the original post:  What are the most overrated and underrated teams?  Are people who bet rares more prudent with their bets than uncommons or commons?  Would the inclusion of all of the historical data from the DotA 2 Lounge affect my results at all?  I scraped all of the data from the first 400 matches at the DotA 2 Lounge using wget in a shell script, and threw out all matches where the bets were either cancelled or where the data was incomplete.  This left me with data on 334 historical matches from which to draw conclusions, including the odds on commons, uncommons and rares separately.  Basically, this analysis will give far better confidence than my previous one, and allow me to ask questions that I was previously unable to.

Let's start again by examining the crowd favor of the winning teams.  Just as in Figure 1 of my previous post, I expect to see this plot skewed to the right if the betting crowd has any ability at all to pick the winning team.

Figure 1:  Histogram of crowd favor of the winning team.  Clearly, the crowd usually favors the winning team (everything to the right of x=0.5 on the graph) and chooses correctly about 2/3 of the time.  

Indeed, Figure 1 shows that the crowd usually picks correctly and favors the winning team about 2/3 of the time.  Remember, though, that the goal of the gambler is not to pick correctly:  the goal is to profit!  First, as in my previous post, I need a control group to compare everything else to.  I will start by getting a handle on how well I will do over time if I flip a coin and bet randomly.  I will put 1 common, uncommon or rare on the team determined by the coin flip and chart my behavior.

Figure 2a:  Number of commons won by random coin flip in the first 334 matches at the DotA 2 Lounge.  Average = -2.7 items, Standard deviation = 19.6 items.
Figure 2b:  Number of uncommons won by random coin flip in the first 334 matches at the DotA 2 Lounge.  Average = -4.0 items,  Standard deviation = 19.4 items.
Figure 2c:  Number of rares won by random coin flip in the first 334 matches at the DotA 2 Lounge.  Average = -3.4, Standard deviation = 19.6 items.

Contrary to my original study with a smaller data set, Figure 2 gives a more flattering view of the wisdom of the crowd.  Betting randomly appears to be a bad idea, paying out at about 0.99:1 over 334 matches.  This is basically the behavior we'd expect in a system where the entire betting public has good information on what's going on.

Let's find out what happens if I bet 1 common, 1 uncommon, and 1 rare on the crowd favorite based on the payout per item for every match.  If there is no crowd favorite (1:1 odds), then I will abstain from betting.  I will track the behavior of my winnings over the 334 matches that had complete data and that were not canceled.

Figure 3a:  Behavior of betting 1 common on the crowd favorite for each of the first 334 complete, non-canceled matches. 
Figure 3b:  Behavior of betting 1 uncommon on the crowd favorite for each of the first 334 complete, non-canceled matches.
Figure 3c:  Behavior of betting 1 rare on the crowd favorite for each of the first 334 complete, non-canceled matches.
Figure 3 shows the behavior of a hypothetical scheme where I bet 1 common, 1 uncommon, and 1 rare on the crowd favorite of each match through the history of the DotA 2 Lounge.  My hypothetical winnings fluctuate around 0 and never come close to the 40-item mark that is necessary in order to reach statistical significance.  This is another mark of a rational crowd:  going with the crowd neither makes you significant gains nor losses over time.  

Now let's try the same experiment, except this time I'm always going to bet against the crowd.  Is this a winning strategy?

Figure 4a:  Behavior of betting 1 common on the underdog for each of the first 334 complete, non-canceled matches.
Figure 4b:  Behavior of betting 1 uncommon on the underdog for each of the first 334 complete, non-canceled matches.
Figure 4c:  Behavior of betting 1 rare on the underdog for each of the first 334 complete, non-canceled matches.
Figure 4 shows that betting on the underdog is also not a great long-term strategy.  Like betting with the crowd, it never approaches the 40-item mark we need in order to reach statistical significance.  So, it seems that the crowd is actually pretty decent at picking the proper odds of winning at the DotA 2 Lounge after all.  Reassuringly, I never indicated that betting with the crowd or against it was a statistically significant improvement over random betting in my previous post.  There is a claim, however, that was statistically significant:  that betting for the left column is a losing strategy over time, and betting for the right column is a winning strategy over time.  In my previous study, these actually were at the border of statistical significance.  Given the larger data set, will these assertions be supported?

Figure 5a:  Behavior of always betting 1 common on the team in the left column.
Figure 5b:  Behavior of always betting 1 common on the team in the right column.
Figure 5c:  Behavior of always betting 1 uncommon on the team in the left column.
Figure 5d:  Behavior of always betting 1 uncommon on the team in the right column.
Figure 5e:  Behavior of always betting 1 rare on the team in the left column.
Figure 5f:  Behavior of always betting 1 rare on the team in the right column.

Figure 5 does seem to show a sustained trend towards gamblers betting favorably towards the team in the left column, and indeed there seem to be times when this could be construed as significant.  In particular, the peak around match 180 in 5b, 5d and 5f seems to be fairly significant given the number of matches played thus far.  Fast forward to today, though, and the crowd has since rectified its irrational ways.  Whether you're betting commons, uncommons or rares in the right-column strategy, you are nowhere near statistical significance today.  

I plan on following up with another post on the most overrated and underrated teams, but first I want to correct my conclusions from my original post.  Upon gathering more data from the DotA 2 Lounge, my previous conclusions are definitely affected:  betting for the right column may have been a statistically significant good strategy in the past, but it is not anymore.   The strategies of flipping a coin, always betting with the crowd, and always betting for the underdog all remain statistically insignificant.  

I definitely made an amateur mistake in overstating the trends I did find.  It is not correct to advocate a strategy (such as flipping a coin or betting for the underdog) that is not statistically significant--I've learned from this mistake, and will not repeat it in the future!

If you'd like to gather your own data from the DotA 2 Lounge and perform your own analysis, I've made the scripts I used available.  Please feel free to use the data you gather for any purpose you like.  If you decide to make your own blog post about the trends you find, let me know and I'll link you from here!

Update:  If you enjoyed this post, you may also like my more recent post: What is the Most Underrated DotA 2 Team?